Media Server – 5 Simple Steps to Convert Your Old PC Into a Media Streamer

Yesterday while hanging out in my attic among all the old stuff I come across my old PC. This computer has been laying there for the last for at least a couple years. Thinking of discarding it properly I started searching for articles on disposal on the internet. While searching for couple of minutes I found a site suggesting the idea of converting an old PC into a media server. Having some bucks to spare and some free time on my hands I decided to go for it.
Just What is a Media Server?
First thing first I am sure some of you are wondering like I initially was, just what is a Media Server. A Media Server is a PC system designed to receive and record TV programs, play back video and handle the digital music and photo libraries available in its storage through a Television unit connected to it. The main components are a robust storage system with ample hard drive space and processing power and Random Access Memory sufficient enough to deliver seamless playback of HD content.
1. Check the performance of your old pc:
Analyzing the old PC, I figured out that it has a 2.4 GHz Pentium IV processor with 256 MB of RAM. While checking the minimum specifications I found that it may struggle when trying to play the HD 1080 videos so I decided to go for a RAM upgrade to 1 GB and stick to the same processor in order to save some bucks in case I also needed to upgrade the hard drive.
2. Check storage; examine hard drive capacity and speed:
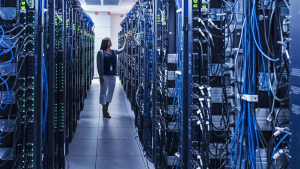
The storage capacity of the old PC is about 40 GB IDE drive; which is much less as compared to the latest media servers. Generally for a media server you should have a capacity of 500gb to have enough space to hold the equivalent of 100s of DVDs. Speed of the hard drives is also a consideration. Luckily both of these problems can be corrected with a raid hard drive array.
RAID vs Single Hard drive:
The RAID array consists of more than one hard drives embedded as a single unit for high capacity and speed than the single hard drive with an external backup. Depending on how the RAID array is configured you can also configure the array for back up security. This is an added benefit as no data would be lost in the event of a hard drive crash.
3. Think about purchasing a Digital TV tuner Card:
A digital TV tuner card is a basic component of media server used to receive and record video content from the local cable or satellite system to the local hard drive. This card is very useful as it will allow to input TV into your PC and record your favorite shows. With several companies charging fees as high $6 per DVR box per month, the one time cost of a TV tuner card could save you quite a bit of money in the long run.
4. Choosing software for you media server:
Windows XP Media Center Edition is a great choice of software for a media server; having a beautiful graphic interface and easy configuration, it is however a bit expensive. If you are strapped for cash Linux based operating systems might be a good choice as they are totally free and have Myth TV software for media server purpose; but they can be hard to configure.
5. Connecting Server to the TV:
The last step involved in this project is establishing a connection between the PC and the TV. You now have to make the decision on whether to connect the media server through a wired or wireless connection. Wireless systems can be more convenient and will allow you to access your media server from throughout your house. Furthermore in terms of the placement of the wireless systems the server can be hidden out of view. The drawback to wireless systems is that they can be expensive. If only a single TV unit is present then simply running a wire from the server to the TV may be better both in terms of cost and speed of setup.